Installing PIXELA ImageMixer 3 SE Ver.6
Codice domanda frequente: 8200752200
Data di rilascio: 18 marzo 2010
Soluzione
This section provides explanations about how to install ImageMixer 3 SE Ver.6 from the PIXELA Application Discs (Disc1 and Disc2).
ATTENTION
Please note that Disc 2 can only be installed after having installed Disc 1.
Installing the Software on Disc 1
ImageMixer 3 SE Ver.6 Transfer Utility can be installed from Disc 1.
1.Insert the PIXELA Application Disc 1 CD-ROM into the computer's CD or DVD drive.
The installation wizard will start automatically.
REFERENCE
Windows Vista users:
Select [ Continue ] in the [User Account Control] window that opens.
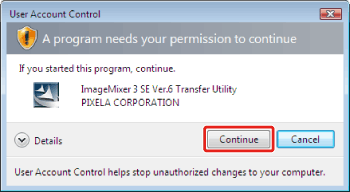
* Windows 7 users:
Click [ YES ] when the [User Account Control] dialog box is displayed.
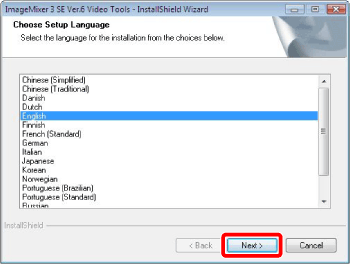
2.Select the language for the installation and click [ Next ].

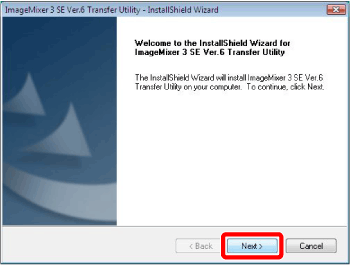
3.Click [ Next ].
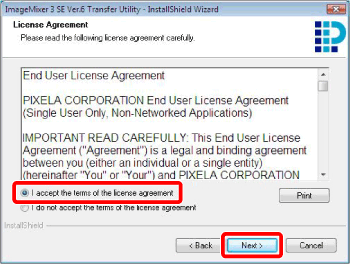
4.Read the license agreement and click [Next].
Select [I accept the terms of the license agreement] to continue. You cannot install the software otherwise.
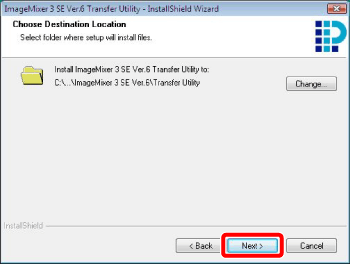
5.Check the destination folder for the installation files and click [Next].
By default, the software is installed in the following location.
C:\Program Files\PIXELA\ImageMixer 3 SE Ver.6\Transfer Utility
If you want to change the destination folder, click [Change] and select a different folder.
6.Click [Install] to begin the installation.
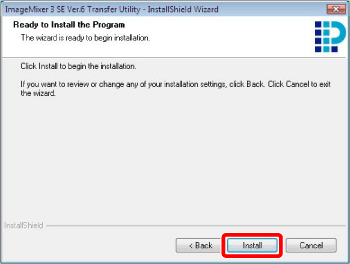
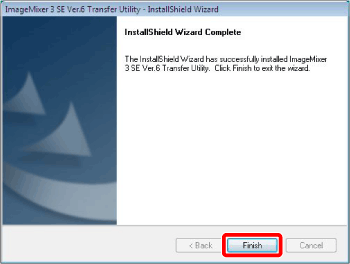
7.Once the installation is completed, click [ Finish ].
8.Remove Disc 1 from the computer.
To install the software on Disc 2, continue to the next section.
Installing the Software on Disc 2
ImageMixer 3 SE Ver.6 Video Tools and ImageMixer 3 SE Player Ver.6 can be installed from Disc 2.
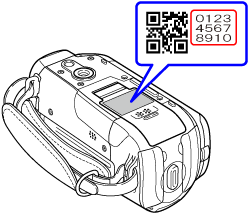
1. Check the serial number of the camcorder.
The serial number is a 12-digit number, which is indicated on the bottom of the camcorder. The serial number is broken down into three lines, each line contains four numbers. The serial number is read from the upper-left to the lower-right.
2. Verify that the computer is connected to the Internet.
During the installation, the software will be activated online. Connect the computer to the Internet and make sure the Internet connection remains active during the installation process.
ATTENTION
If Internet connection is not available, call a PIXERA CORPORATION user support center and get the Certification code. Give the operator the serial number of your camcorder to get a certification code. Write down the certification code and have it ready to activate the software manually.
3. Insert the PIXELA Application Disc 2 CD-ROM into the computer's CD or DVD drive.
The installation wizard will start automatically.
REFERENCE
If the User Account Control window opens, select [Yes] (for Windows 7) or [Continue] (for Windows Vista).
4. Select the language for the installation and click [Next].
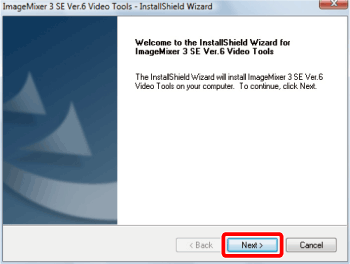
5.Click [Next].
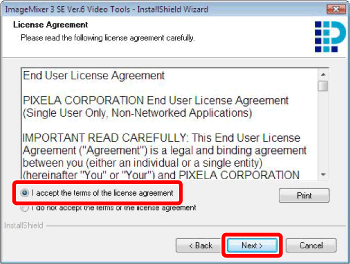
6. Read the license agreement and click [Next].
Select [I accept the terms of the license agreement] to continue. You cannot install the software otherwise.
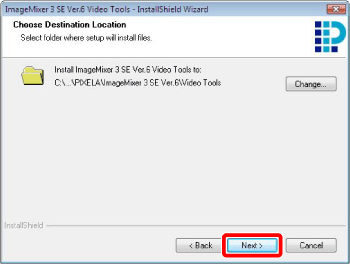
7. Check the destination folder for the installation files and click [Next].
By default, the software is installed in the following location.
C:\Program Files\PIXELA\ImageMixer 3 SE Ver.6\Video Tools
If you want to change the destination folder, click [Change] and select a different folder.
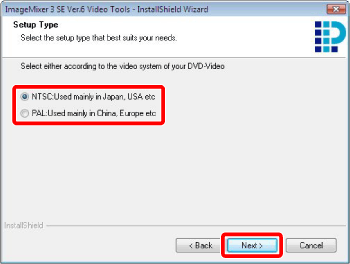
8. Select your local video system and click [Next].
The video system is indicated in the lower-left corner on the cover page of Quick Guide, which is supplied with the camcorder.
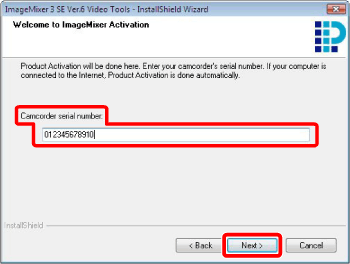
9. Enter the serial number of your camcorder and click [Next].
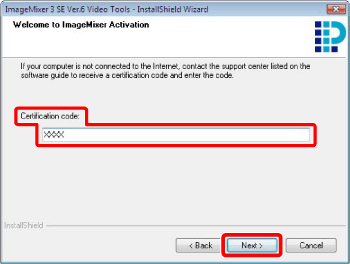
ATTENTION
If an Internet connection is not detected, you will be asked to enter the Certification code manually.
Call a PIXERA CORPORATION user support center and get the Certification code. Enter the Certification code you received and click [Next].
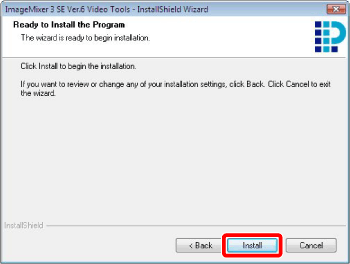
10. Click [ Install ] to begin the installation.
11. Once the installation is completed, remove Disc 2 from the computer.
[Yes, I want to restart my computer now.] and click [Finish].
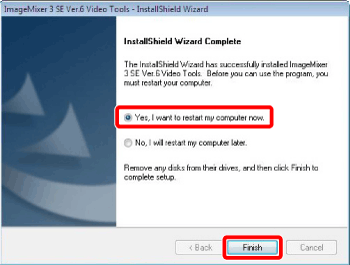
This completes the installation of PIXELA ImageMixer 3 SE Ver.6.
Modelli interessati
- LEGRIA HF R106
- LEGRIA HF R16
- LEGRIA HF R18